Mount'n Mover
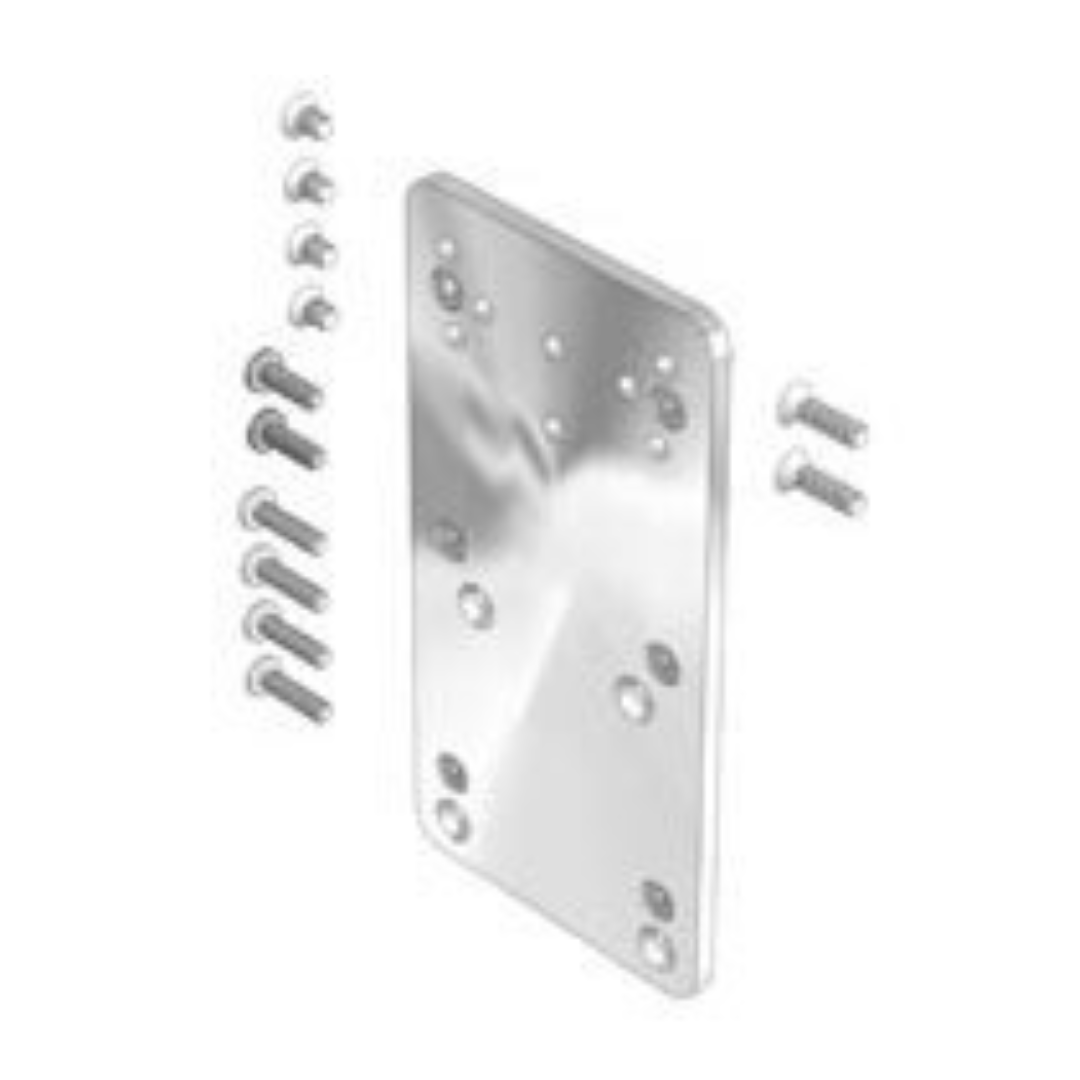
Tobii Dynavox Maestro, T10, T15, V, Vmax, M3, DV4, MT4 Device Plate
DP-DV1
$75.00 USD
-
Σχεδιασμένο από τα άτομα με ειδικές ανάγκες
για άτομα με ειδικές ανάγκες -
100% ικανοποίηση
Εγγύηση -
Κατώτατο κόστος αποστολής
Αναφέρεται στο καλάθι
 Introduction to Device Attachment
To attach your device to the Mount'n Mover system, you will need to determine how your device can attach to the Quick Release Plate (QRP).
Some devices attach directly to the QRP and others require an additional device specific attachment plate.
Device Attachment Guide
Dynavox - Maestro
This device attachment requires the use of the Dynavox Maestro Mounting Bracket, available from Dynavox or BlueSky Designs.
Σας παρακαλούμε επικοινωνήστε μαζί μας if you want to get this thru BlueSky Designs
Step 1: Place the shallow spacers

Place the shallow spacers over the top three threaded holes on the Maestro.
- τρία 1/8" plastic spacers
Step 2: Attach the Maestro Mount Spacer

Attach the Maestro Mount Spacer over the plastic spacers placed in step 1, using the three screws provided.
- three #8-32 x ½" flat head screws
Dynavox - V or M3

DP-DV1 : Rev 7
My plate looks different!
Direct attachment to my QRP
Dynavox - Vmax
Ταγκό
Instructions Coming Soon
If this does not match your device, Παρακαλώ ενημερώστε μας. We want to help.
Περιγραφή
 Introduction to Device Attachment
To attach your device to the Mount'n Mover system, you will need to determine how your device can attach to the Quick Release Plate (QRP).
Some devices attach directly to the QRP and others require an additional device specific attachment plate.
Device Attachment Guide
Dynavox - Maestro
This device attachment requires the use of the Dynavox Maestro Mounting Bracket, available from Dynavox or BlueSky Designs.
Σας παρακαλούμε επικοινωνήστε μαζί μας if you want to get this thru BlueSky Designs
Step 1: Place the shallow spacers

Place the shallow spacers over the top three threaded holes on the Maestro.
- τρία 1/8" plastic spacers
Step 2: Attach the Maestro Mount Spacer

Attach the Maestro Mount Spacer over the plastic spacers placed in step 1, using the three screws provided.
- three #8-32 x ½" flat head screws
Dynavox - V or M3

DP-DV1 : Rev 7
My plate looks different!
Direct attachment to my QRP
Dynavox - Vmax
Ταγκό
Instructions Coming Soon
If this does not match your device, Παρακαλώ ενημερώστε μας. We want to help.
Επιλεγμένη παραλλαγή
2.0 lbF.A.Q
Θα στείλουμε πληροφορίες παρακολούθησης στη διεύθυνση ηλεκτρονικού ταχυδρομείου που σχετίζεται με την παραγγελία σας μόλις αποσταλεί το στοιχείο. Εάν δεν έχετε λάβει τις πληροφορίες παρακολούθησης και ήταν πάνω από 2 εργάσιμη ημέρα, επικοινωνήστε μαζί μας στο (012) 123 - 4567
Σχετικά προϊόντα
Πρόσφατα προβεβλημένα
Πρόσφατα επιθυμητή λίστα
Προσθέστε την προαιρετική περιγραφή σε αυτήν την ενότητα


