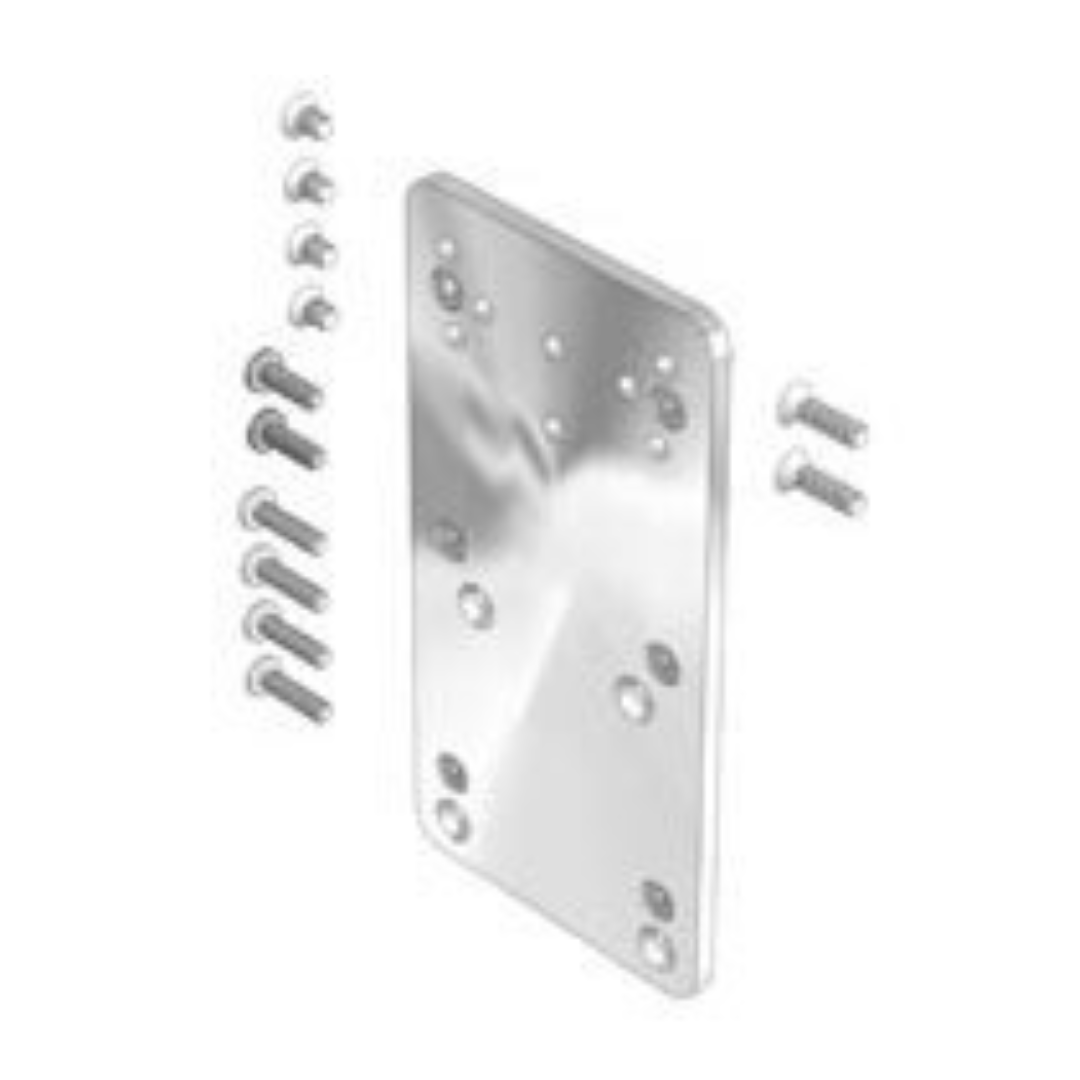
Mount'n Mover
Tobii Dynavox Maestro, T10, T15, V, Vmax, M3, DV4, MT4 Device Plate
DP-DV1
₴3,242.00
-
Zaprojektowany przez osób niepełnosprawnych
dla osób niepełnosprawnych -
100% satysfakcji
Gwarancja -
Wysyłka o najniższych kosztach
Cytowany w koszyku
 Wprowadzenie do załącznika urządzenia
To attach your device to the Mount'n Mover system, you will need to determine how your device can attach to the Quick Release Plate (QRP).
Some devices attach directly to the QRP and others require an additional device specific attachment plate.
Podręcznik załącznika urządzenia
Dynavox - Maestro
This device attachment requires the use of the Dynavox Maestro Mounting Bracket, available from Dynavox or BlueSky Designs.
Proszę Skontaktuj się z nami if you want to get this thru BlueSky Designs
Step 1: Place the shallow spacers

Place the shallow spacers over the top three threaded holes on the Maestro.
- trzy 1/8" plastic spacers
Step 2: Attach the Maestro Mount Spacer

Attach the Maestro Mount Spacer over the plastic spacers placed in step 1, using the three screws provided.
- three #8-32 x ½" flat head screws
Dynavox - V or M3

DP-DV1 : Rev 7
My plate looks different!
Direct attachment to my QRP
Dynavox - Vmax
Tango
Instructions Coming Soon
If this does not match your device, Daj nam znać. We want to help.
Opis
 Wprowadzenie do załącznika urządzenia
To attach your device to the Mount'n Mover system, you will need to determine how your device can attach to the Quick Release Plate (QRP).
Some devices attach directly to the QRP and others require an additional device specific attachment plate.
Podręcznik załącznika urządzenia
Dynavox - Maestro
This device attachment requires the use of the Dynavox Maestro Mounting Bracket, available from Dynavox or BlueSky Designs.
Proszę Skontaktuj się z nami if you want to get this thru BlueSky Designs
Step 1: Place the shallow spacers

Place the shallow spacers over the top three threaded holes on the Maestro.
- trzy 1/8" plastic spacers
Step 2: Attach the Maestro Mount Spacer

Attach the Maestro Mount Spacer over the plastic spacers placed in step 1, using the three screws provided.
- three #8-32 x ½" flat head screws
Dynavox - V or M3

DP-DV1 : Rev 7
My plate looks different!
Direct attachment to my QRP
Dynavox - Vmax
Tango
Instructions Coming Soon
If this does not match your device, Daj nam znać. We want to help.
Wybrany wariant
2.0 lbF.A.Q
Po wysłaniu elementu wyślemy informacje o śledzeniu na adres e-mail powiązany z zamówieniem. Jeśli nie otrzymałeś informacji o śledzeniu i minęło ponad 2 dzień roboczy, skontaktuj się z nami pod numerem (012) 123 - 4567
Produkty powiązane
Niedawno oglądane
Niedawno na liście życzeń
Dodaj opcjonalny opis do tej sekcji


